Space Configuration
Within each Confluence space, the Space Tools » Cenote Lockpoint page provides access to a set of pages for administering Cenote Lockpoint within the context of that specific space:
| Page | Description |
|---|---|
| Locked Files | Display a list of all locked files in the space |
| Permissions | Controls activation of Lockpoint in the space, as well as Lockpoint Administrator privileges for the space. |
| Email Notifications & Unlock Timeouts | Controls the contents and timing of email notifications, as well as the timing and enablement of automatic unlocking. |
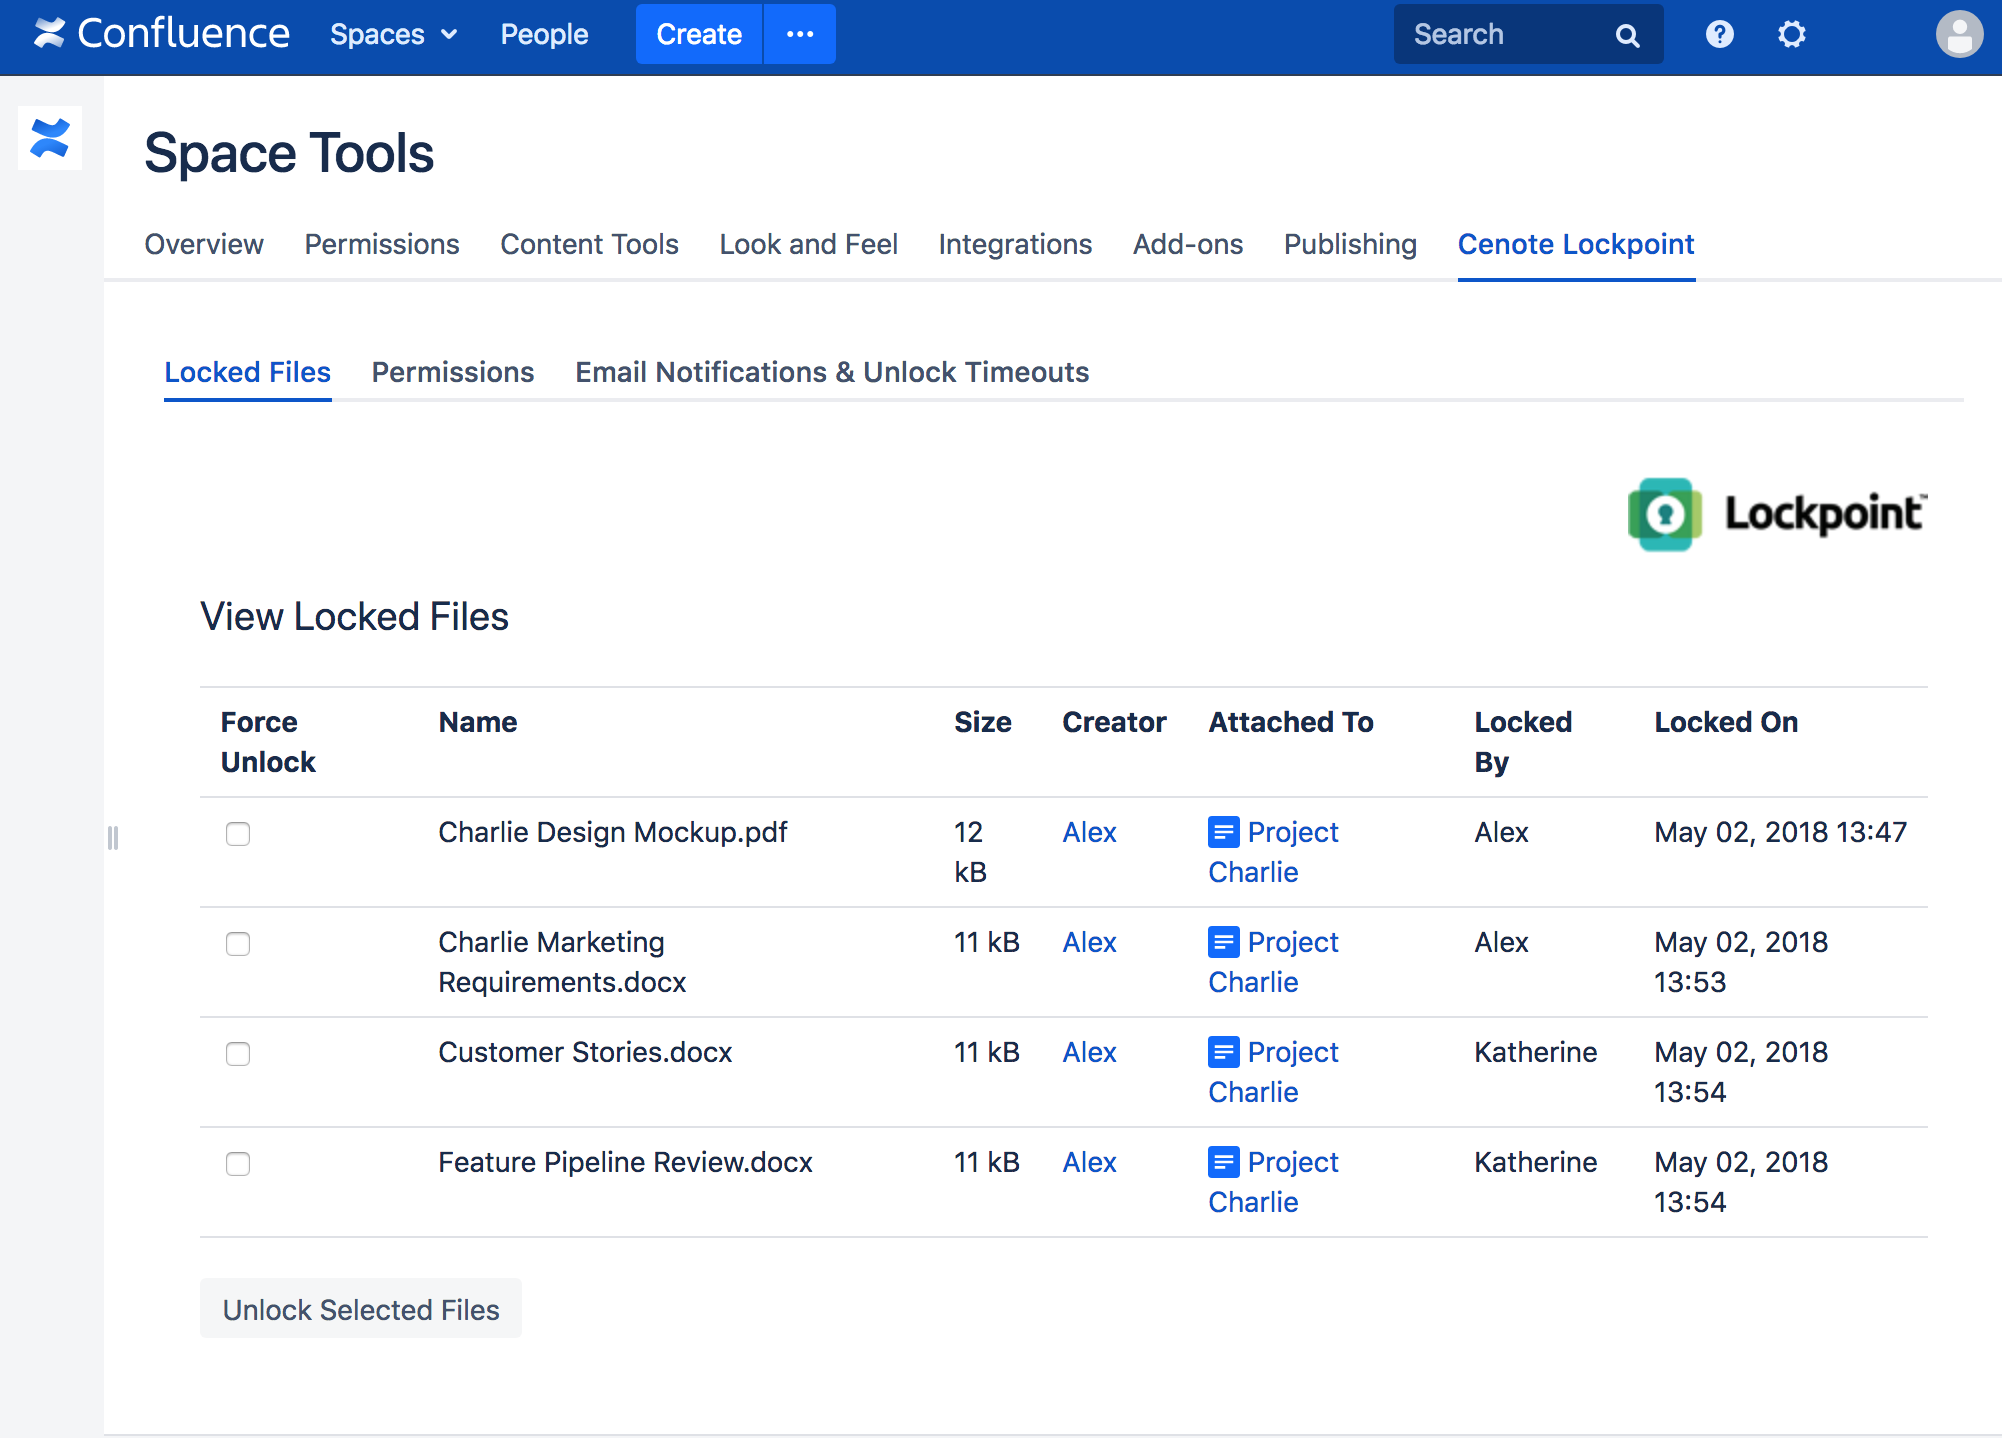
Viewing Locked Files
The Space Tools » Cenote Lockpoint » Locked Files page contains a list of all currently locked files in the space.
This page is only available to users who have Lockpoint Administrator permissions. See Lockpoint Administrator Functions in the User Guide for more details on the Locked Files page.
Permissions
The Space Tools » Cenote Lockpoint » Permissions page allows you to specifically enable or disable Lockpoint in a space, as well as define which user(s) or group(s) will be considered Lockpoint Administrators for this space.
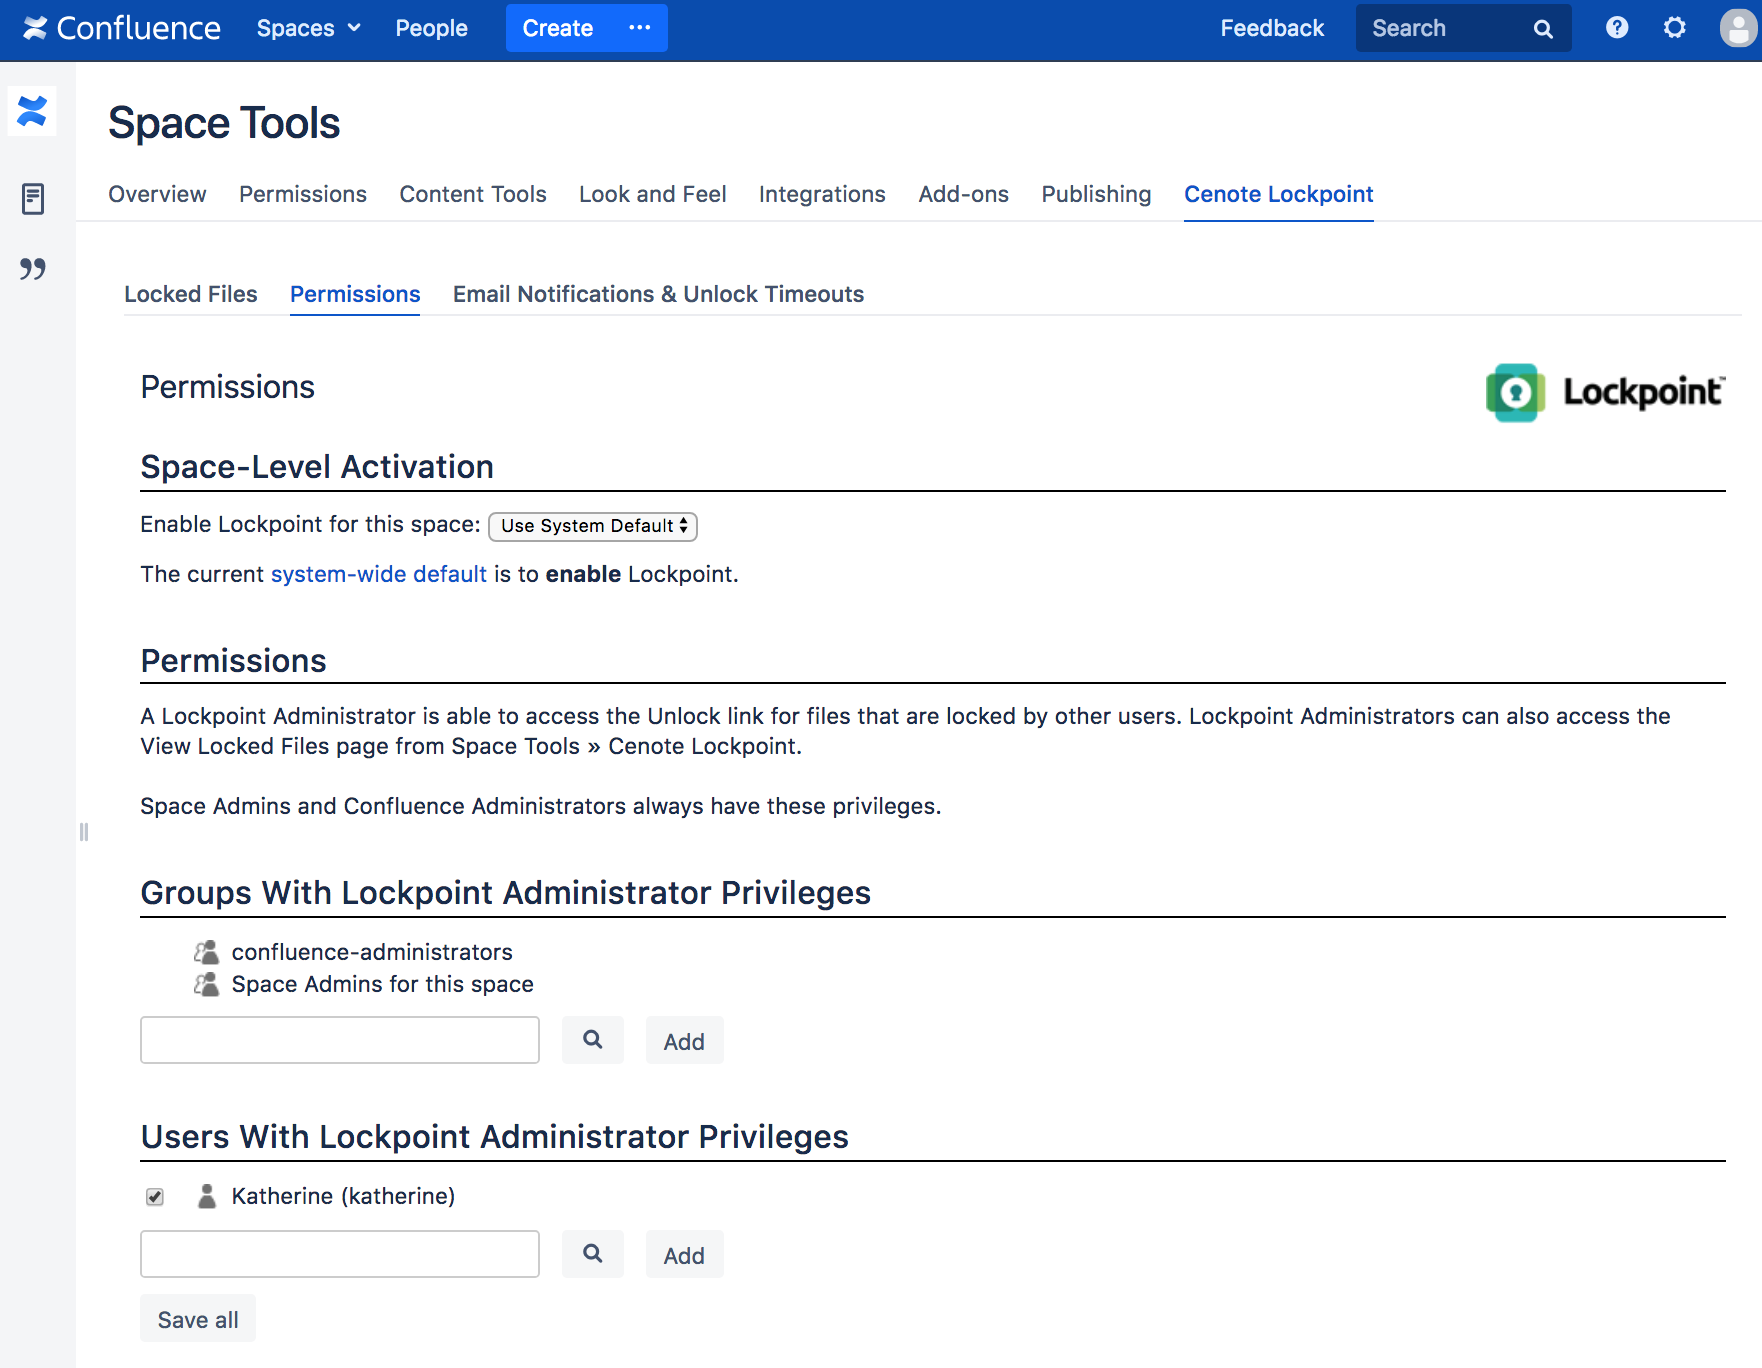
Enabling or Disabling Lockpoint
By default, all spaces use the system-wide global setting to enable or disable Lockpoint in the space. The value of the global setting is shown on this page under Space-Level Activation.
To override the global setting for Lockpoint in this space only, open the Enable Lockpoint for this space dropdown, select either "Yes" or "No", and then click "Save all".
Assigning Lockpoint Administrators
Lockpoint Administrators are users, or groups of users, who have the ability to:
- view a list of all locked files in a space (using Space Tools » Cenote Lockpoint » Locked Files), and
- unlock files that are locked by other users (by manually clicking on the Force Unlock link).
By definition, space administrators and members of the confluence-administrators group are always Lockpoint Administrators.
You can define additional Lockpoint Administrators on a space-by-space basis.
To add a user or group, enter the group or user name in the relevant section and click "Add".
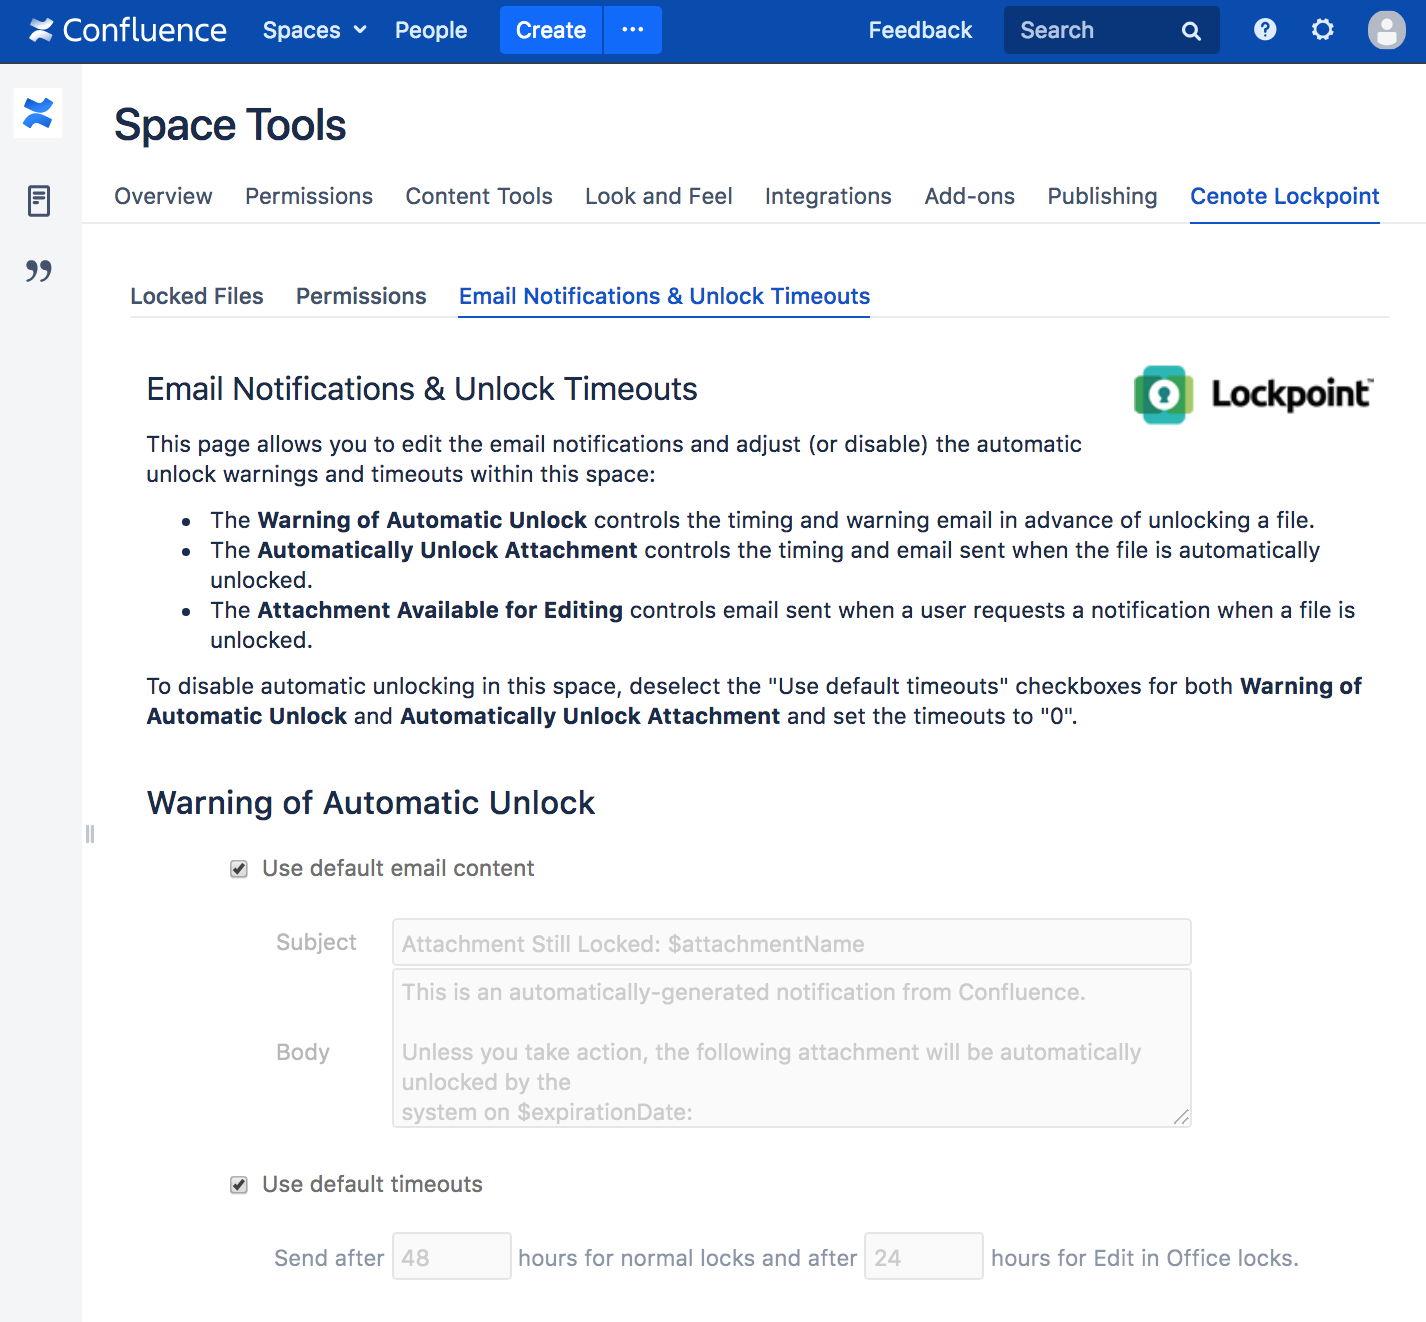
Email Notifications & Unlock Timeouts
The Space Tools » Cenote Lockpoint » Email Notifications & Unlock Timeouts page allows you to adjust the parameters used when sending email notifications to users about documents that have been locked for too long, and also to adjust the interval used by (or disable) the automatic unlocking feature. These changes are applied on a space-by-space basis only (but see the note below related to making global changes).
The system sends warnings about forced unlocks, messages when a forced unlock actually happens, and also messages to users who have requested notification when specific documents are unlocked. The text of each message (and the timing of the scheduled messages) can be configured individually.
For Lockpoint 1.6.6 and Above
In Lockpoint 1.6.6+, you can provide new email template content and/or new timeouts in order to override the defaults, but you need not change both at the same time. For example, you could change the timeouts but continue using the system-default email templates.
For each type of event, in Lockpoint 1.6.6+, select the Use default email content checkbox in order to use the default email templates, and select the Use default timeouts checkbox in order to use the default timeouts.
For Lockpoint 1.6.5 and Below
In Lockpoint 1.6.5 and below, the timeouts and email content overrides are tied together, so if you override the default timeouts, you must also override the email content (and vice versa).
In Lockpoint 1.6.5 and below, this editing functionality is combined into one single Use System Default Email Settings checkbox.
Customizing Email Contents
For any version of Lockpoint, use the following placeholder variables in your customized email content to have Lockpoint add attachment-specific text to each email notification:
| Replacement Variable | Description |
|---|---|
| $attachmentName | Filename of the attachment |
| $expirationDate | Date that the attachment will be unlocked (for warning email only) |
| $lockedDate | Date that the attachment was originally locked |
| $pageName | Name of the page containing the attachment |
| $pageLink | Link to the page containing the attachment |
| $owner | Username of the user who has locked the file |
To customize the content and settings for a type of email notification, unselect the appropriate checkbox, make your changes, and click Save Options to apply your changes. (In Lockpoint 1.6.5 and below, instead click Save Email Options.)
Customizing Unlock Timeout And Automatic Unlock Intervals
For any version of Lockpoint, both the warning and forced unlock emails support a configurable notification interval, depending on whether the file was locked via the "Lock" link or automatically via Edit in Office (or by using a WebDAV client).
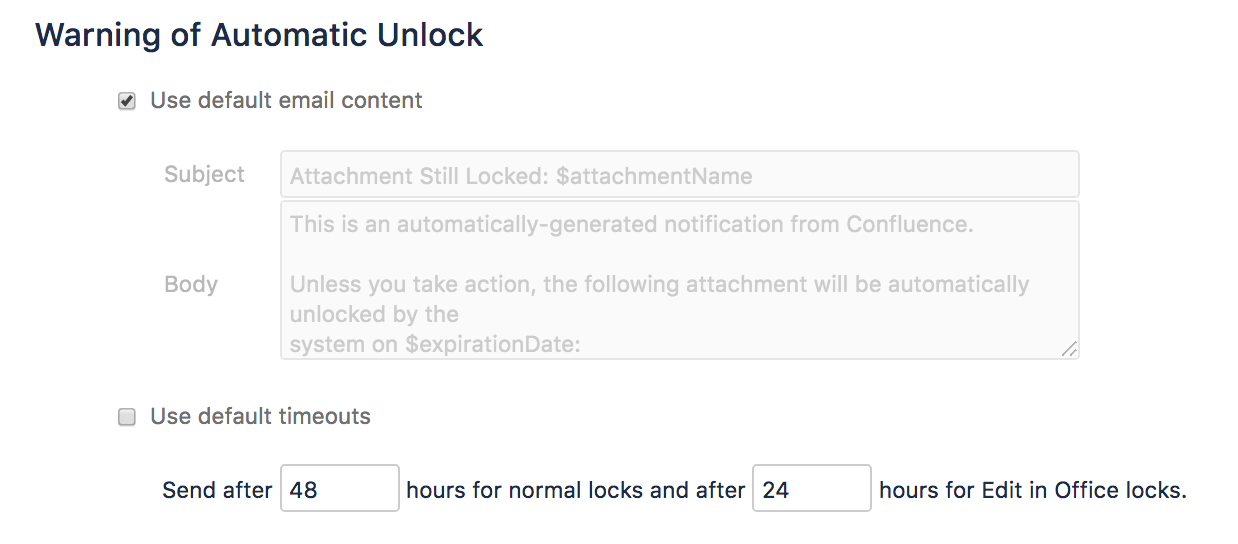
Lockpoint uses the following default notification intervals:
- Lockpoint will send a warning to the user after an attachment has remained locked for 48 hours (or for 24 hours for files locked via Edit in Office or WebDAV)
- Lockpoint will automatically unlock the attachment and email the user after the attachment has been locked for 72 hours (or 48 hours for files locked via Edit in Office or WebDAV)
To customize the timeout, unselect the appropriate checkbox, make your changes, and click Save Options to apply your changes. (In Lockpoint 1.6.5 and below, instead click Save Email Options.)
Customizing the Global Unlock Timeout and Setting Email Templates in All Spaces
If you have many spaces, you may not wish to adjust the timeout and email templates in each space individually. Although there is no UI component available to do this, a workaround is published in the Lockpoint FAQ that describes how to make this change.
Page Contents